Required Permission
Adding custom attribute involves modification in Active Directory schema which requires the modifying user to be a member of Schema Administrators and Enterprise Administrators groups. By default, the Administrator account is a member of the Schema Administrator group.
Adding custom attribute to user object includes the following procedures
- Register Schema snap-in
- Creating Custom Attribute
- Adding Custom Attribute to User Class
- Restarting Active Directory Domain Services
Register Schema snap-in
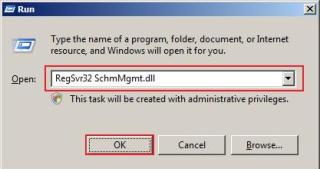
- Press the keys ‘Windows‘ + ‘R‘.
- Type the command RegSvr32SchmMgmt.dll in text field and click OK button.
Creating Custom Attribute
- Press the keys ‘Windows‘ + ‘R‘ to open Run Window.
- Type the command mmc.exe and click OK button.
- Go to File -> Add/Remove snap-in…or simply press the keys ‘Ctrl’ + ‘M’ to open Add/Remove snap-in.
- Select the snap-in Active Directory Schema, click Add >, and click the button OK.
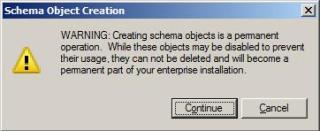
6. If you receive Schema Object Creation warning message,click continue to proceed.
7. Generating OID: To create custom attribute we need to give new OID. To create new OID, check this article https://www.morgantechspace.com/2013/08/generate-oid-to-create-custom attribute.html to know about how to create new OID using VBScript. Copy the script code from above article and paste it in Notepad file and save the file with the extension .vbs like GenerateOID.vbs
Run this VBScript file and you will see the output window like below screen.
- Common Name: Pan ID
- LDAP Display Name: panID – (This value automatically populates while you typing Common Name but you can change it if you want give other value)
- Unique X500 Object ID: 1.2.840.113556.1.8000.2554.53105.25931.2174.18205.37173.12892922.10177807
and displayed in child node of Attributes. see the below image.
Adding Custom Attribute to User Class
To add newly created attribute to User Class follow the below steps.
2. Right-click the user class, select properties, navigate to Attributes tab, and click Add button.
Restarting Active Directory Domain Services
1. Press the keys ‘Windows‘+ ‘R‘ to open Run Window.
2. Type the command services.msc and click OK button.
3. Select the service Active Directory Domain Services, right-click the service, click Restart, and click Yes to Restart all the related services.
Checking new attribute in Active Directory Users and Computers Console
1. Press the keys ‘Windows‘+ ‘R‘ to open Run Window.
2. Type the command dsa.msc and click OK button.
3. Select the user object Administrator, Right-click->Properties ->Attributes and check the attribute panID.
Thanks,
Morgan
Software Developer


Nice Article. Thank you. if we have multiple DCs in the environment, how long would you recommend waiting before we restart AD DS on the other controllers.
Very Very Nice Article Morgan . thanks
Thank you for the concise solution.
amazing and detailed article Morgan, thanks